
Exploring the Art of Inlay in Kumamoto, Japan

Some of the tools required for ‘higo’ inlay
Ever since I’ve read The Way of Crafts: Origin of a Century of Japanese Aesthetics Way of Crafts by Soetsu Yanagi — a phenomenal book that led me to write an open letter to the late author in a story published earlier — I couldn’t help reviewing my past adventure into the world of crafts through his lens.
At work, I’m mostly occupied by the creative process of product development, immersing in the universe of artisanship on a day to day basis. My interest in craftsmanship not only evolved from my innate curiosity towards the making but can be traced back to many years of training I’ve had in traditional jewellery making, stone setting, and hand engraving before becoming a jewellery designer by profession. Yet, I hate to admit that it’s been years since I’ve last held a soldering torch, a metalworking file or a burin in my hand.
From time to time, I find myself longing for that sense of empowerment — of being able to give birth to things that did not exist with the skills I possess; however, as time goes by, I’ve also come to realise that my real passion isn’t about practicing the craft but lies in the exploration and learning of crafts from the artisans around the world. Whether they’re considered as guardian or innovator of their specialised craft, I hold a deep respect for the craftsmen and their pursuit of perfection.
“…as time goes by, I’ve also come to realise that my real passion isn’t about practicing the craft but lies in the exploration and learning of crafts from the artisans around the world.”
Among a myriad of crafts, I’ve been fortunate to have the opportunity to explore in-depth the art of inlay through academic research, as well as hands-on experience in both Europe and Asia. For readers who are not familiar with inlay, the technique is simply the insertion of contrasting material in a base (or substrate), forming a design or pattern.
A wide range of materials are known to have been used for both the inlays and its base, including metal, stones, wood, shell… etc. Despite the variety of resources adopted, it is important to note that the material selected for the inlay must be softer than the comparatively harder substrate. In metalworking, for example, soft metal such as gold, silver and copper were — since ancient times — inlaid on a base made of bronze and iron. As a result of its decorative nature, the inlay technique are more likely to be found in decorative arts and adornments.
Higo zogan in Kumamoto, Japan
Deemed a “Nationally Designated Craft”, higo zogan (or higo inlay) can be traced back to more than 400 years ago in early Edo period when a craftsman known as Matashichi Hayashi first adopted this technique to adorn firearms and swords for the Samurai. His work was highly praised by Hosokawa Tadaoki — the ruling samurai warrior — who suggested to Matashichi to try the inlays on knives and tobacco pipes, too.
With gold and silver wire set against a pitch-black backdrop, it is not difficult to imagine how objects decorated with higo zogan became one of the highly coveted collectibles. When the carrying of swords was outlawed in 1876 as a result of the Sword Abolishment Edict, higo craftsmen turned to everyday objects and accessories, allowing this unique form of art to survive up to this day.

Kumamoto City Handicrafts Promotion Centre
Courtesy of Kumamoto City Handicrafts Promotion Centre
Poised in a quiet neighbourhood, the Kumamoto City Handicrafts Promotion Centre is a treasure house that strives to keep the traditional arts and crafts of the region thrive and living. Every week, some locals — both young and old — gathered here at the centre to continue working on their inlay piece; they are regular students of the instructor, Inada Mitsuhide, and have been learning and practicing higo zogan for years. Sitting in the classroom among other advanced learners of the craft, I felt as if I were — for a second — one of them, too.
Preparing the base for higo inlay
Before the inlay process began, the first and foremost important step we had to take was to prepare the base. After receiving a flat tip chisel and a hammer, we were taught to engrave the provided metal surface (possibly steel) with crosshatched lines, forming a texture that resembles woven cloth. These textures, when looking closely, created a series of serrated lines on the surface, allowing the base to better secure the inlay material. Since this very first step would take quite some time to master, after about fifteen to twenty minutes of practice, the instructor kindly handed out to each of us a pendant made of iron — with its base already prepared for inlay — to move on to the next step.

A silver leaf in the shape of gingko leaf is placed on the iron base
In the inlay process, we were first asked to choose from a box that contained tiny silver leaf in a variety of shapes, including but not limiting to flower, star, cloud, sun and moon, to decorate our pendant. I was quick to pick out a gingko leaf, and placed another tiny piece of silver leaf next to it to simulate a falling gingko leaf that’s been blown afar by the breeze. Once I fixed these two pieces in place, I placed my hammer on them and tried to fix them in place. Then, I inlaid with caution a super fine silver wire to denote the stem of the gingko leaf. After I’ve made sure that the inlays were set, I was taught to smooth out the surface.
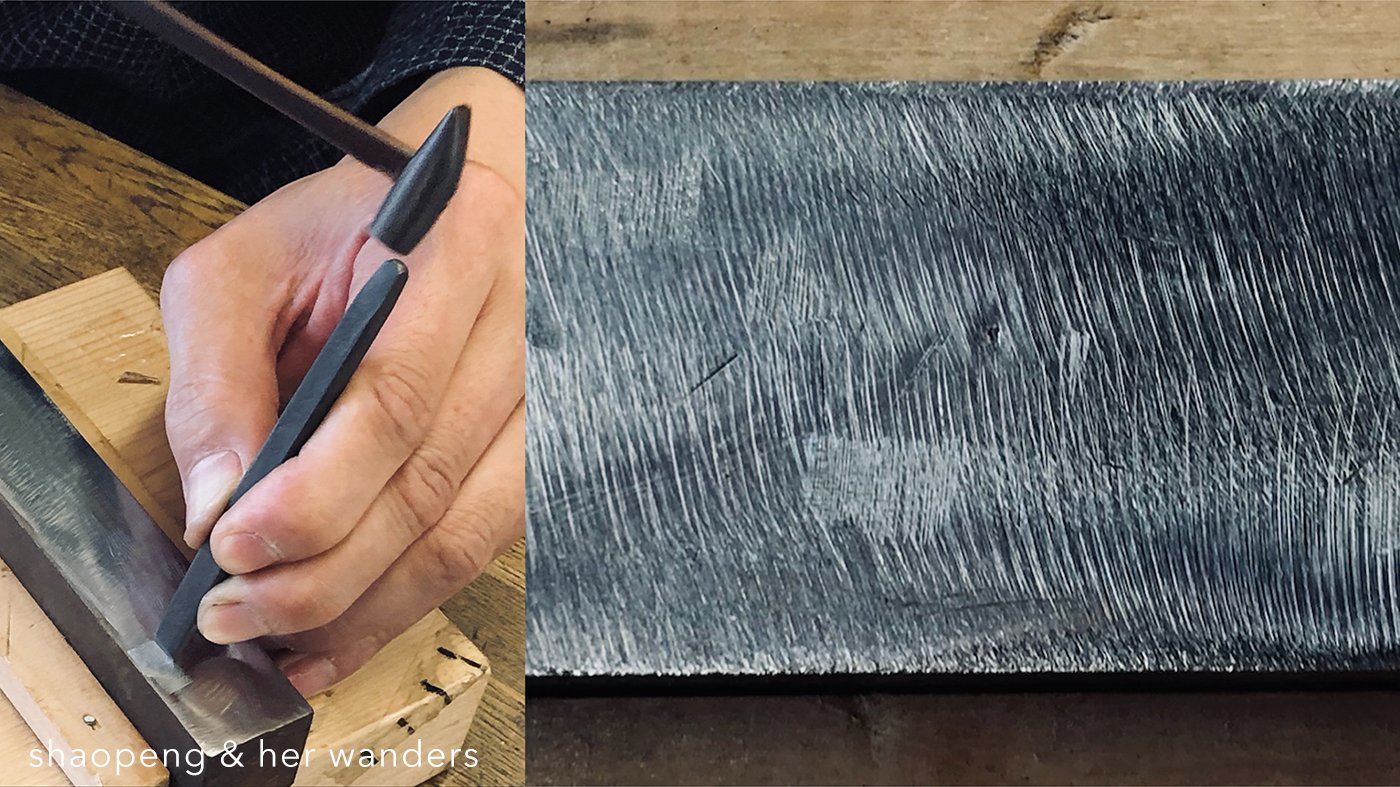
Then came the final step — we were asked to remove the remaining crosshatched lines on the base with a utensil made of stainless steel. It was a very exhausted process as we had to go back and forth around the same area until those marks were beginning to fade. It was also a task that one had to pay a lot of attention to, especially when we were getting close to the edge of the inlay.

The process of smoothing out the textured iron base
Upon completion, we left the pendant to the instructor as some special treatment to the piece was to be followed up. Now, perhaps some of you curious readers may think that the creation of higo zogan described above looks easy, the writer must remind you that there’s so much more behind every single step. While the steps involved in each process wouldn’t be very difficult for someone who’s been trained in jewellery making, higo zogan is certainly, in my view, a delicate technique that requires many years of practice, as well as lots of patience, to master.